
How to Use Keiki Paste On Orchids
Keiki paste is a fantastic tool for all orchid lovers. It allows you to direct your plant's growth for easy propagation, spectacular flower production, and stunning full foliage. While keiki paste is easy to use, there's no doubt that proper application significantly improves its results. In this article, we'll explain everything you need to know about using keiki paste on orchids.
For a quick tutorial, watch the video above!
What is keiki paste?
The word 'keiki' is Hawaiian for 'baby' and refers to the clones or "pups" produced by orchids. These keikis are mini-versions of the mother plant and the go-to method for propagating orchids. As discussed in this article, orchids are difficult to grow from seed and rarely produce keikis naturally.
This is where keiki paste enters the picture: It can be applied to plant nodes to stimulate the growth of keikis. Proper application can also encourage the development of additional flower spikes or foliage when desired.
The main ingredient in keiki paste is cytokinin, a plant hormone that promotes cell division and growth. This is not to be confused with rooting hormone products that use auxins like indolebutyric acid (IBA) to stimulate roots. Keiki paste uses cytokinin, a plant hormone that promotes cell division and growth. We wrote an article about plant hormones that goes more in-depth if you want to nerd out!
Monopodial vs. sympodial orchids
Discussing orchid morphology and structure is essential before we get into the details of using keiki paste. There are two main types of orchids: monopodial and sympodial. Depending on which type you are working with, applying keiki paste will be different.
Single Stem Orchids (Monopodial): These orchids have a single upright stem from which their leaves and flowers are produced. Many also produce large aerial roots. In monopodial orchids, the nodes are located on the stem of the flower spike.
- Phalaenopsis (Moth Orchids)
- Vanda (Vanda Orchids)
- Angraecum (Comet Orchids)
- Aerides (Foxbrush Orchids)
Clumping Orchids (Sympodial): These orchids are easily recognizable due to the large swollen "pseudobulbs" they grow from. These pseudobulbs are inflated plant stems from the below-ground rhizome that spreads horizontally. Nodes on sympodial orchids are located at the base of the pseudobulbs.
- Cattleya (Corsage Orchids or Queen of the Orchids)
- Cymbidium (Boat Orchids)
- Dendrobium (Cane Orchids or Singapore Orchids)
- Miltonia (Pansy Orchids)
- Oncidium (Dancing Lady Orchids or Golden Shower Orchids)
- Paphiopedilum (Slipper Orchids or Lady Slipper Orchids)
See this article for more on the difference between monopodial and sympodial orchid types.
How to use keiki paste on orchids
Keiki paste works by applying it directly onto dormant nodes to stimulate them to "wake up". Depending on where you apply it, you can get these dormant buds to either form a keiki or another bloom. Regarding orchids, node selection is essential and distinct depending on whether you have a single-stem orchid (monopodial) or a clumping orchid (sympodial).
If you need clarification on what a node is, read this article.
Before you try keiki paste, consider these two crucial points:
- Keiki paste should be used on healthy orchids that are actively growing. It should not be used on orchids that are stressed, diseased, dehydrated, or have recently experienced shock. Using keiki paste in these contexts could further stress the plant.
- It is best to apply keiki paste to orchids in full bloom or slightly past this point. It can also work shortly after the plant has lost all its blooms, but avoid using keiki paste when the plant is producing its flower spike.

How to apply keiki paste on monopodial orchids
On monopodial orchids, keiki paste is applied directly onto the nodes of the flowering stem (spike).
Depending on where you apply it, it can stimulate a different reaction.
- Applying it on nodes near the bottom of the stem typically induces the formation of keikis
- Applying it to dormant buds near the top stimulates a flowering stem.
While we'll discuss all the details below, you can also check out our new video at the top of this post, in which we show you how to apply Keiki paste to a Phalaenopsis orchid.
-
Select a healthy dormant node Identify a dormant and healthy node on the stem of your orchid spike.

-
Remove the bract A thin sheath known as a bract covers the nodes. This bract should be carefully removed to damage the node. The easiest way to do this is by wedging a toothpick between it and the stem (tweezers also work) until the bract can be easily peeled off.

-
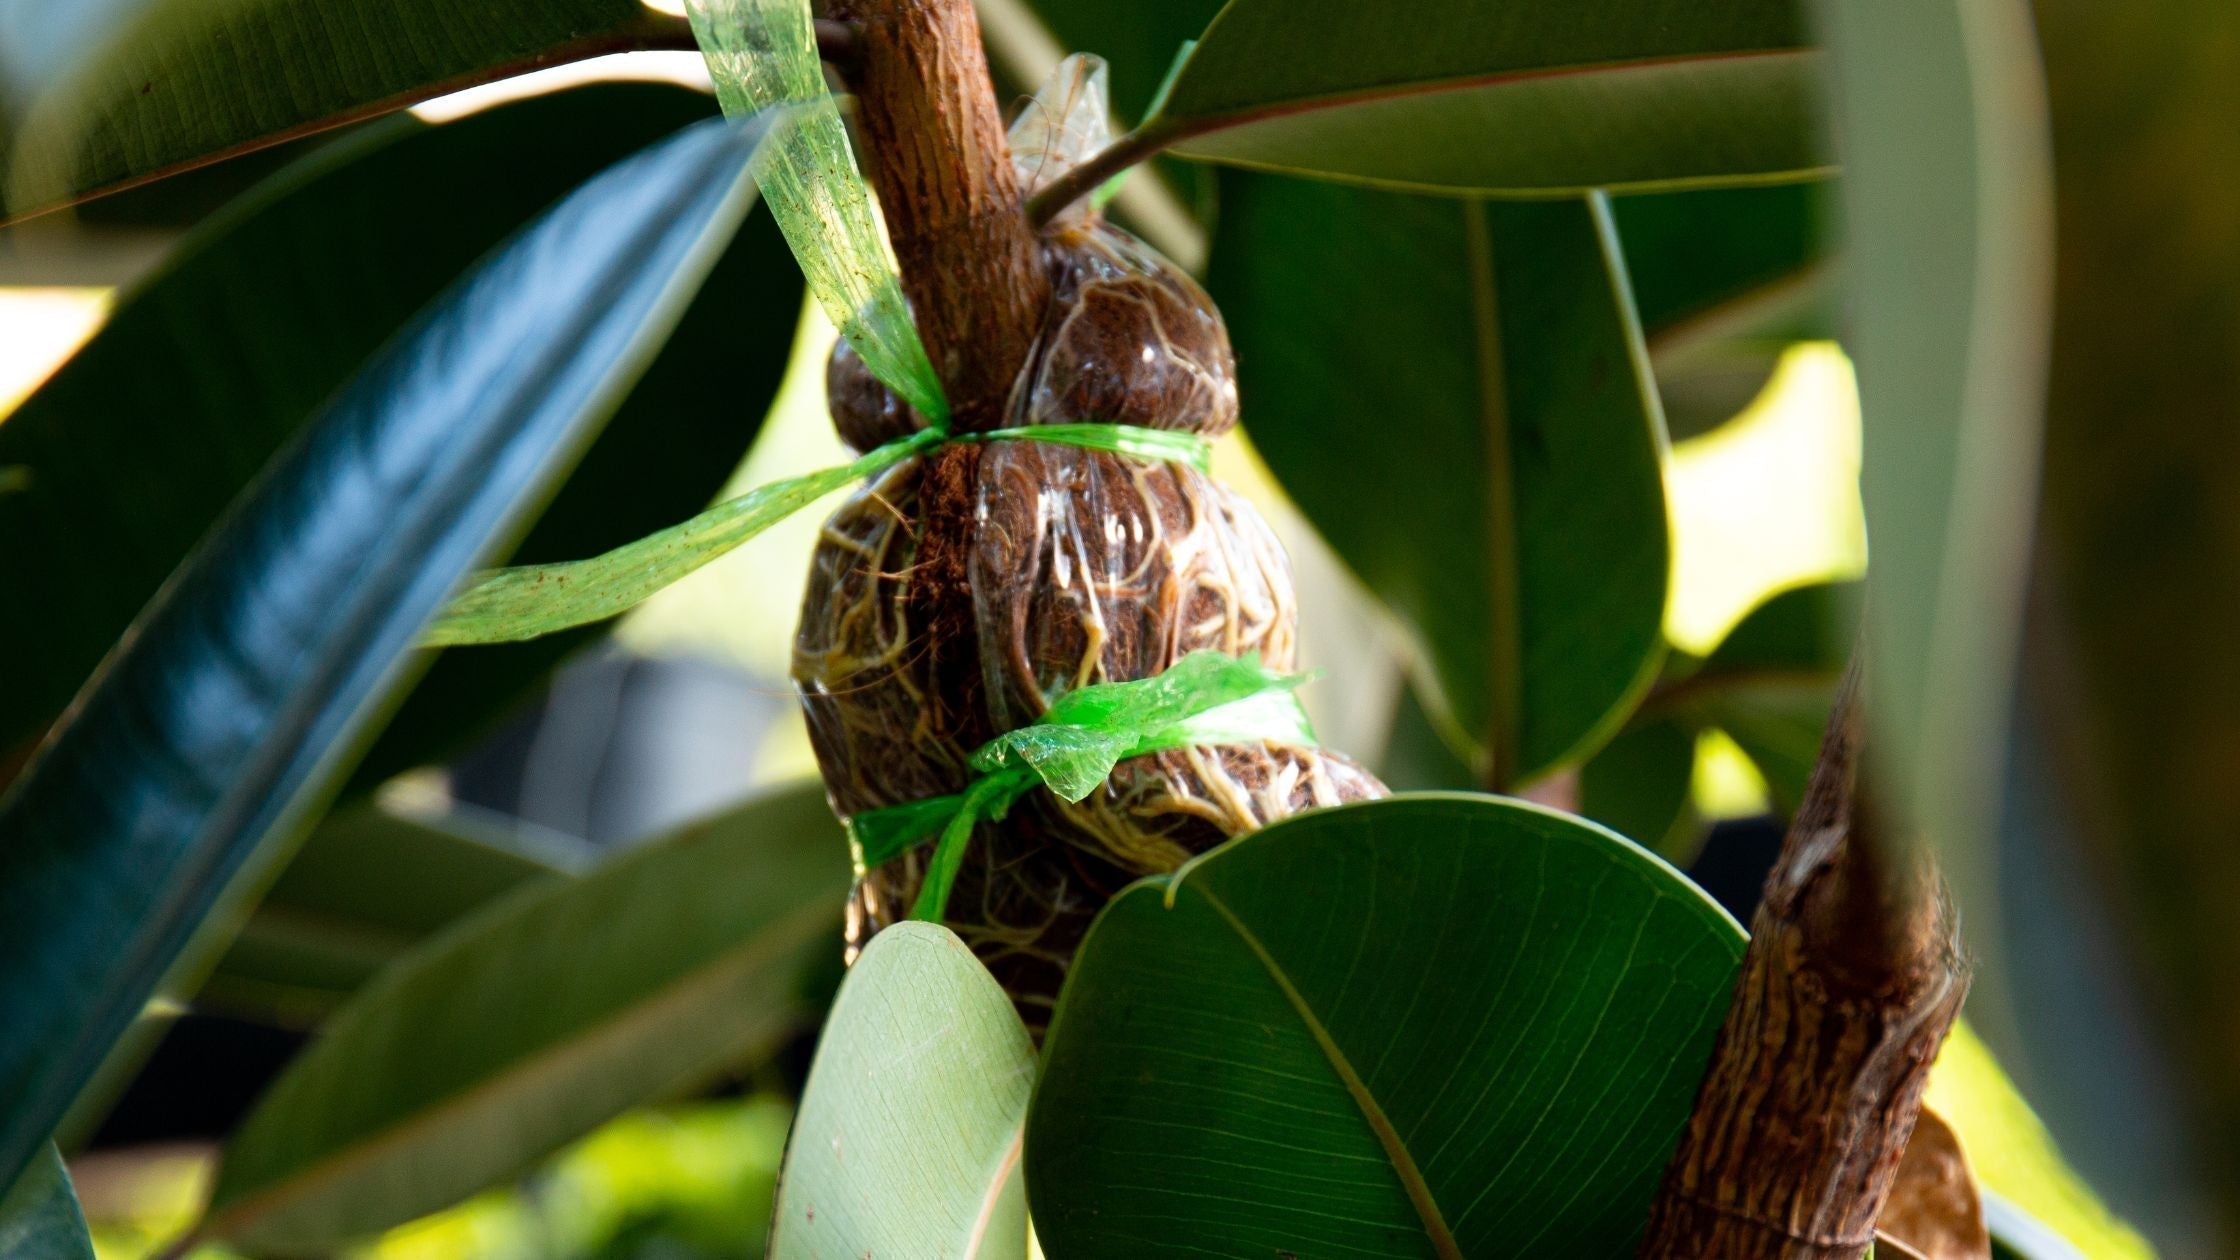
Apply keiki paste Once you've removed the bract, use a stick or cotton swab to apply a pea-sized paste to the freshly exposed node.

- Continue regular plant care Maintain your usual orchid care routine.
- Monitor for growth In 3-6 weeks, you should start to notice growth at the node. If you need clarification on whether it's a new bloom or a keiki, observe its development over time. Keikis resemble miniature orchids with leaves and roots.
- Remove and pot the keiki Once the keiki has developed several healthy roots (at least 2-3 inches long), you can carefully separate it from the mother plant. Use a sterilized cutting tool (like a razor blade or pruning shears) to cut the stem below the keiki. Plant the keiki in the same pot alongside its mother plant for optimal results. Co-potting allows the keiki to continue benefiting from the established root system of the mother plant while developing its own. Once established, you can transplant it into its own pot.

How to apply keiki paste to sympodial orchids
Since sympodial orchids can be easily reproduced through division (by splitting the rhizomes), keiki paste isn't required for their propagation. That said, keiki paste can be great for promoting new growth on dormant parts of a rhizome.
Keiki paste works great for species like Cattleya (pictured above), which can have extensive rhizomes with little vegetative growth (usually on the older parts of the rhizome). The application will not only help flesh out the plant and make it look healthier, but it can also be beneficial to make suitable propagation material.
- Locate the nodes On sympodial orchids, find the nodes at the base of the pseudobulb. There are usually 2-3 dominant nodes in this area.
- Remove the bract Gently remove the papery bract covering the node. You can often do this with your fingers, but use a toothpick or tweezers if necessary.
- Apply keiki paste Once the node is exposed, apply a pea-sized amount of keiki paste directly to the node.
- Continue regular plant care Take care of your plant as usual, providing plenty of care and attention.
- Observe and wait Monitor your plant's reaction to the keiki paste. You should see new growth on the treated node within a few weeks.
- Propagating via division Propagating sympodial orchids is relatively easy, thanks to the below-ground rhizome. Simply remove the orchid from its pot and gently untangle its roots. Divide the rhizome into sections with at least 3-4 healthy pseudobulbs with a sterilized cutting tool. These sections can now be planted into their pot, ensuring that the base of the pseudobulb is level with the soil's surface.
Get Crazy Keiki Cloning Paste HERE
P.S. Have you failed at growing orchids? Can’t get them to rebloom, or even keep them alive? If this sounds like you, we you’ve got to check out our friend, Raffaele, from Ohio Tropics and his brand new course on becoming an orchid master!
This is orchid growing SIMPLIFIED! You won’t believe how easy they are once you learn the basics.
Sign up now and get $50 OFF when you use the code: ORCHIDCOURSE.
CLICK HERE TO BECOME AN ORCHID MASTER!
Leave a comment
This site is protected by hCaptcha and the hCaptcha Privacy Policy and Terms of Service apply.